- 본 글은 모달과 다이얼로그의 개념을 엄밀하게 구분하지 않고 혼용해서 사용하고 있으니 참고해주세요. 팝업 UI를 모두 다이얼로그로 지칭하고 있습니다.
배경
전 회사에서 근무했을 때, 아래와 같은 코드를 발견했다. 다른 로직들은 다 제거하고 다이얼로그와 관련된 코드 예시다.
import { useState } from 'react';

import AlertDialog from '@component/dialog';

const Component = () = {
   const [isOpen, setIsOpen] = useState(false);

  return (
    div
      button onClick={() = {setIsOpen(true)}} 버튼 /button
      {isOpen && AlertDialog / }
    /div

  )

}
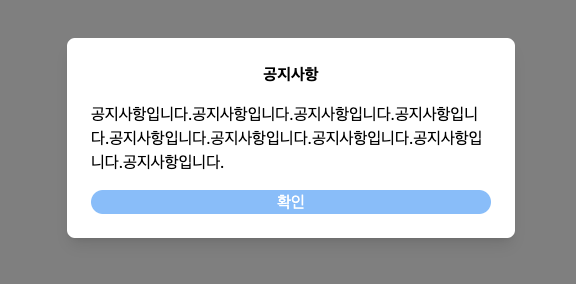
위 코드에서 AlertDialog는 웹페이지에서 어떤 버튼을 클릭했을 때, 사용자에게 정보를 알려주는 다이얼로그다. 대충 아래의 다이얼로그와 비슷한 경우라고 할 수 있다.
간단한 다이얼로그를 사용하는 경우라면 크게 상관 없을 지도 모른다. 하지만 세상 일이라는 것이 단순하면서도 단순하지 않다.
문제 상황: 끈적거리는 다이얼로그
위의 예시처럼 정해진 정보를 사용자에게 알려주고, 확인 버튼을 누르면 닫는 방식의 다이얼로그는 외부에서 전달 받는 데이터가 없다.
하지만 아래와 같이 다이얼로그에 따라 다이얼로그 외부의 데이터를 전달받아야 하는 상황이 발생할 수 있다.
import React from 'react';

type UserData = {
  name: string;
  age: number;
  address: string;
};

type MyComplexDialogProps = {
  isOpen: boolean;
  user: UserData;
  errorMessages: string[];
  currentStep: number;
  isVerified: boolean;
  isLoading: boolean;
  onConfirm: () = void;
  onCancel: () = void;
  onRetry: () = void;
};

function MyComplexDialog({
  isOpen,
  user,
  errorMessages,
  currentStep,
  isVerified,
  isLoading,
  onConfirm,
  onCancel,
  onRetry,
}: MyComplexDialogProps) {
  if (!isOpen) return null;

  return (
    div
      style={{
        border: '1px solid #ccc',
        padding: '16px',
        backgroundColor: '#fff',
      }}

      h2복잡한 다이얼로그/h2
      p현재 스텝: {currentStep}/p
      p사용자 이름: {user.name}/p
      p나이: {user.age}/p
      p주소: {user.address}/p
      p인증 여부: {isVerified ? '인증됨' : '인증 안됨'}/p

      {errorMessages.length  0 && (
        div style={{ color: 'red' }}
          h3에러 메시지/h3
          ul
            {errorMessages.map((msg, idx) = (
              li key={idx}{msg}/li
            ))}
          /ul
        /div
      )}

      div
        button onClick={onConfirm} disabled={isLoading}
          확인
        /button
        button onClick={onCancel}취소/button
        {!isVerified && (
          button onClick={onRetry} disabled={isLoading}
            재시도
          /button
        )}
      /div
    /div
  );
}

export default MyComplexDialog;
다이얼로그를 사용하는 컴포넌트 ParentComponent 는 이 다이얼로그를 사용하기 위해 필요한 데이터를 관리하고 트리거하여 전달한다.
import React, { useState } from 'react';
import MyComplexDialog from './MyComplexDialog'; // 다이얼로그 import

function ParentComponent() {
  // 사용자 관련 상태
  const [userName, setUserName] = useState('홍길동');
  const [userAge, setUserAge] = useState(20);
  const [userAddress, setUserAddress] = useState('서울');

  // 에러 관련 상태
  const [errorMessages, setErrorMessages] = useStatestring[]([]);

  // 다이얼로그 노출 상태
  const [isDialogOpen, setIsDialogOpen] = useState(false);

  // 인증 상태, 로딩 상태
  const [isVerified, setIsVerified] = useState(false);
  const [isLoading, setIsLoading] = useState(false);

  // 단계 관리
  const [currentStep, setCurrentStep] = useState(1);

  // 다이얼로그 열기
  const handleOpenDialog = () = {
    setIsDialogOpen(true);
  };

  // 다이얼로그 닫기
  const handleCloseDialog = () = {
    setIsDialogOpen(false);
    // 다이얼로그를 닫을 때, 에러 초기화나 단계도 초기화할 수 있음
    setErrorMessages([]);
    setCurrentStep(1);
  };

  // 확인(확정) 버튼
  const handleConfirm = () = {
    // 확인 시 로직 예시
    if (!isVerified) {
      setErrorMessages((prev) = [...prev, '아직 인증되지 않았습니다.']);
      return;
    }
    alert('확인되었습니다!');
    handleCloseDialog();
  };

  // 재시도 버튼
  const handleRetry = async () = {
    setIsLoading(true);
    // 인증 재시도 로직 예시 (가짜 타이머)
    setTimeout(() = {
      setIsVerified(true);
      setIsLoading(false);
      setCurrentStep((step) = step + 1);
    }, 1000);
  };

  return (
    div
      h1다이얼로그 사용 예시/h1
      p이름: {userName}/p
      p나이: {userAge}/p
      p주소: {userAddress}/p

      button onClick={handleOpenDialog}복잡한 다이얼로그 열기/button

      MyComplexDialog
        // 다이얼로그 열림 여부
        isOpen={isDialogOpen}
        // 사용자 정보
        user={{
          name: userName,
          age: userAge,
          address: userAddress,
        }}
        // 에러 목록
        errorMessages={errorMessages}
        // 현재 단계, 인증 여부, 로딩 상태
        currentStep={currentStep}
        isVerified={isVerified}
        isLoading={isLoading}
        // 콜백 함수
        onConfirm={handleConfirm}
        onCancel={handleCloseDialog}
        onRetry={handleRetry}
      /
    /div
  );
}

export default ParentComponent;
MyComplexDialog 다이얼로그를 트리거하여 state를 props로 전달해야 할 필요는 알겠지만, 이런 방식으로 전달하는 방법은 언뜻 봐도 문제가 있어 보인다.
또한 UI 컴포넌트는 필요하다면 API 서버와 통신하여 데이터를 fetch 하는 로직도 필요하다.
import { useEffect } from 'react';

function ParentComponent() {
  // 사용자 관련 상태
  const [userName, setUserName] = useState('홍길동');
  const [userAge, setUserAge] = useState(20);
  const [userAddress, setUserAddress] = useState('서울');

  // ... 중략 ...

  // User data fetch
  useEffect(() ={
  	async function fetchUserData() = {
    	const response = await fetch('url');
      	const data = await response.json();

      	setUserName(data.userName);
      	setUserAge(data.userAge);
      	setUserAddress(data.userAddress)
    }
    fetchUserData();
  }, [])

  // ... 중략 ...

}
ParentComponent에 MyComplexDialog와는 관계 없는 state와 effect 로직이 많아질수록, 언제 사용될지 모르는 MyComplexDialog가 껌딱지처럼 ParentComponent 코드에 달라붙어있는 모습은 유지보수와 확장에 큰 악영향을 준다.
만약 둘 중 하나라도 코드를 수정해야 하는 상황이 된다면, 예를 들어 적어도 props 중 전달받는 data의 타입이 달라지는 상황에 처한다면 다이얼로그의 Props 타입을 슬쩍 수정한 것만으로도 파일 목록에 시뻘건 줄이 그어져 있는 모습을 마주할 수 있을 것이다.
문제 해결 목표
다이얼로그를 최대한 덜 끈적거리게 사용하는 방법을 Context API와 Custom Hook을 통해 구현해보고자 한다.
Context API는 컴포넌트 간 상태 공유를 위해 사용하는 것이므로 필요에 맞게 zustand, recoil 같은 클라이언트 상태 관리 라이브러리로 대체하면 구현이 훨씬 간편해질 수 있다.
하지만 팀 상황에 따라 React의 기본 인터페이스로만 우선 작업해야 하는 경우가 있으므로, Context API로 구현해본다.
import { useEffect } from 'react';

import { useDialogAction } from './hooks';
import { DialogTypes } from './dialog';


function ParentComponent(){
  // ... 생략 ...
  const { openDialog, closeDialog, updateDialog } = useDialogAction();

  // User data fetch
  useEffect(() ={
  	async function fetchUserData() = {
    	const response = await fetch('url');
      	const data = await response.json();

      	setUserName(data.userName);
      	setUserAge(data.userAge);
      	setUserAddress(data.userAddress)
    }

    fetchUserData();
  }, [])

  // Dialog 상태 업데이트(option)
  useEffect(() = {
    updateDialog(DialogTypes.User, (prev) = ({
    	...prev,
      	user: {
        	name: userName,
          	age: userAge,
          	address: userAddress
        }
    }), true);
  }, [userName, userAge, useAddress])

  return (
    div
      h1다이얼로그 사용 예시/h1
      p이름: {userName}/p
      p나이: {userAge}/p
      p주소: {userAddress}/p

      button onClick={() = {
        openDialog(DialogTypes.User)
    	}}
        복잡한 다이얼로그 열기
      /button
    /div
  );

}
1단계: Context 정의하기
먼저 다이얼로그 관리를 위한 Context를 정의한다. createContext와 useReducer를 조합해 사용하며, 여기서는 다이얼로그가 여러 개 동시에 열릴 수 있다는 점을 고려해 다이얼로그 상태를 배열 형태로 관리한다.
DialogContext에서는 현재 열려 있는 다이얼로그 배열을 조회하고,DialogDispatchContext에서는 다이얼로그를 열거나 닫는 액션을 수행한다.
이렇게 Context를 두 가지로 나누는 이유는, **읽기(dialog 상태 조회)와 쓰기(dispatch로 액션 전달)를 분리하기 위해서다. **
아래 예시처럼 DialogProvider를 구현하고, 내부에서 reducer를 통해 dialog 상태와 액션을 관리한다. 또한 뒤로 가기(브라우저 히스토리 popstate)가 발생하면 모든 다이얼로그를 닫도록 처리해, 다이얼로그가 브라우저 이동 히스토리에 끼어들지 않도록 한다.
// contexts/dialog

import React, { createContext, Dispatch, useEffect, useReducer } from 'react';
import { DialogType, DialogProps } from 'components/common/dialog/types';

export type Dialog = {
  type: DialogType;
  props: DialogProps[DialogType];
} | null;

export type DialogActionT extends DialogType =
  | {
      type: 'SHOW_DIALOG';
      dialogType: T;
      dialogProps: DialogProps[T];
    }
  | { type: 'HIDE_DIALOG' }
  | { type: 'HIDE_DIALOG_ALL' }
  | {
      type: 'SHOW_ERROR';
      dialogProps: DialogProps[T];
      error?: Error;
      redirectTo?: string;
    };

type DialogContextType = {
  dialog: Dialog[];
} | null;

export const DialogContext = createContextDialogContextType(null);
export const DialogDispatchContext = createContext
  DispatchDialogActionDialogType | undefined
(undefined);

function reducer(dialog: Dialog[], action: DialogActionDialogType): Dialog[] {
  switch (action.type) {
    case 'SHOW_DIALOG':
      return [
        ...dialog,
        {
          type: action.dialogType,
          props: { ...action.dialogProps, isOpen: true },
        },
      ];
    case 'HIDE_DIALOG':
      return dialog.slice(0, -1);
    case 'HIDE_DIALOG_ALL':
      return [];
    case 'SHOW_ERROR':
      return [
        ...dialog,
        {
          type: 'ERROR',
          props: {
            ...action.dialogProps,
            isOpen: true,
            title: action.error?.title,
            message: action.error?.message,
            redirectTo: action.redirectTo,
          },
        },
      ];
    default:
      return dialog;
  }
}
export function DialogProvider({ children }: { children: React.ReactNode }) {
  const [dialog, dispatch] = useReducer(reducer, []);

  useEffect(() = {
    const handlePopState = () = {
      dispatch({ type: 'HIDE_DIALOG_ALL' });
    };

    window.addEventListener('popstate', handlePopState);

    return () = {
      window.removeEventListener('popstate', handlePopState);
    };
  }, [dispatch]);

  return (
    DialogContext.Provider value={{ dialog }}
      DialogDispatchContext.Provider value={dispatch}
        {children}
      /DialogDispatchContext.Provider
    /DialogContext.Provider
  );
}
1.5단계: Dialog와 Dialog Component Props 타입 구조화하기 (선택)
다이얼로그가 많아지면 다이얼로그 별로 필요한 props가 달라 복잡해지기 쉽다. 이 문제는 TypeScript를 사용하면 쉽게 해결할 수 있다.
예를 들어 다이얼로그 타입을 미리 정의하고, DialogType별로 필요한 props를 모아두는 전략을 취할 수 있다.
DialogTypeMapper 객체를 만들어 다음과 같이 작성해보자.
export const DialogTypeMapper = {
  Confirm: 'CONFIRM',
  Error: 'ERROR',
  User: 'USER',
} as const;

export type DialogType = (typeof DialogTypeMapper)[keyof typeof DialogTypeMapper];
이렇게 문자열 리터럴 타입을 만들고, 각 다이얼로그 종류별로 필요한 props를 DialogProps라는 매핑 타입에 정리한다.
export type DialogProps = {
  CONFIRM: ConfirmDialogProps;
  ERROR: ErrorDialogProps;
  USER: UserDialogProps;
};
이렇게 정리하면, 다이얼로그가 많아질수록 props 관리가 훨씬 명확해진다. props 구조가 바뀌면, 다이얼로그를 사용하는 쪽에서 타입 에러를 통해 문제를 빠르게 찾을 수 있기 때문이다.
만약 새로운 다이얼로그를 생성하고자 한다면 아래와 같이 Props를 지정해줄 수 있다.
// 코드 예시

import { useEffect, useState } from 'react';
import type { DialogProps } from './types';

export const ConfirmDialog = ({
  isOpen = false,
  onClose,
  title,
  message,
  ok,
  cancel,
  hideOk,
  textInput,
  width = 360,
  height,
  onKeyUp,
}: DialogProps['CONFIRM']) = {
  const [text, setText] = useState('');

  return (
    Dialog
      open={isOpen}
      onClose={onClose}
      onKeyUp={onKeyUp}

		{...}
    /Dialog
  );
};
2단계: Render Dialog Root Component 생성하기
Context에 저장된 다이얼로그 배열을 실제로 렌더링할 컴포넌트를 만드는 방법이다.
예를 들어 DialogRoot라는 컴포넌트를 만들어, dialog 상태를 순회하면서 알맞은 다이얼로그 컴포넌트를 매핑한다.
dialog 배열에는 { type, props } 형태의 객체가 들어 있다.
type을 통해 어떤 다이얼로그인지 식별하고,
그에 맞는 컴포넌트를 DIALOG_CONTENT_TYPES 객체에서 가져와 렌더링한다.
이렇게 공통 Root를 두면, 다양한 다이얼로그를 한 곳에서 일괄 관리할 수 있다.
- *예를들어, ConfirmDialog, AlertDialog, UserDialog 등 여러 다이얼로그를 한꺼번에 매핑해줄 수 있다. **
import { DialogType } from 'components/common/dialog/types/DialogTypeMapper.ts';
import { useDialog } from 'hooks/dialog';
import {
  ConfirmDialog,
  UserDialog,
 // ...
} from '../common/dialog';

const DIALOG_CONTENT_TYPES: { [key in DialogType]: any } = {
  USER: UserDialog,
  CONFIRM: ConfirmDialog,
};

const DialogRoot = () = {
  const context = useDialog();
  const { dialog } = context;

  if (!dialog) return /;

  return (

      {dialog.map((info, idx) = {
        if (!info) return;
        const RenderDialog = DIALOG_CONTENT_TYPES[info?.type];
        const RenderDialogProps = info.props;
        return RenderDialog key={`dialog-${info.type}-${idx}`} {...RenderDialogProps} /;
      })}
    /
  );
};

export default DialogRoot;
3단계: Custom Hook 정의하기
컴포넌트마다 useContext를 직접 사용하여 다이얼로그의 컨텍스트를 사용하는 것보다 컨텍스트를 사용하는 목적에 맞게 Custom hook으로 분리하여 사용하는 것이 유지보수 측면에서 효율적이다.
useDialog와 useDialogDispatch라는 Custom Hook을 만들고, 다이얼로그의 컨텍스트를 바탕으로 열고 닫는 로직을 정의한다.
- showDialog(type, props, error, redirectTo?)
- type에 따라 다이얼로그를 열고,
- 필요한 props를 함께 전달한다. 에러 다이얼로그(ERROR 타입)인 경우 에러 정보를 받아 에러 메시지를 표시할 수도 있다.
- hideDialog(to?, all?)
- 다이얼로그를 닫을 때, 다른 경로의 페이지로 교체해야 한다면 관련 함수를 호출한다.
- useNavigation의 navigate(to, {replace: true})
- window.location.replace()
- all이 true라면 모든 다이얼로그를 닫는다.
// hooks/dialog.ts

import { useContext } from 'react';
import { DialogType, DialogProps } from 'components/common/dialog/types/DialogTypeMapper';
import { DialogContext, DialogDispatchContext } from 'contexts/dialog';

export function useDialog() {
  const context = useContext(DialogContext);
  if (!context) throw new Error('DialogContext is empty.');

  return context;
}

export function useDialogDispatch() {
  const dispatch = useContext(DialogDispatchContext);

  if (!dispatch) throw new Error('Cannot find DialogDispatch');

  const hideDialog = (to?: string, all?: boolean) = {
    dispatch({
      type: !!all ? 'HIDE_DIALOG_ALL' : 'HIDE_DIALOG',
    });

    if (to) {
      window.location.replace(to);
    }
  };

  const showDialog = T extends DialogType(
    type: T,
    props?: DialogProps[T],
    error?: Error,
    redirectTo?: string
  ) = {
    if (type === 'ERROR') {
      dispatch({
        type: 'SHOW_ERROR',
        dialogProps: {
          ...COMMON_DIALOG_PROPS,
          ...(props ?? {}),
        },
        error: error,
        redirectTo: redirectTo,
      });
      return;
    }

    dispatch({
      type: 'SHOW_DIALOG',
      dialogType: type,
      dialogProps: {
        ...COMMON_DIALOG_PROPS,
        ...(props ?? {}),
      },
    });
  };
  return { showDialog, hideDialog };
}
4단계: 적용하기
마지막으로 Context, DialogRoot, Custom Hook을 적절히 조합해 애플리케이션에 적용한다.
- Provider 세팅: 최상단(예: App 컴포넌트)에서 DialogProvider로 전체를 감싼다.
- DialogRoot 등록: 마찬가지로 루트 레벨에 DialogRoot를 배치해, 어느 페이지에서든 다이얼로그가 동일한 위치에 팝업되도록 한다.
- 사용하는 컴포넌트에서 useDialogDispatch(): 다이얼로그를 열어야 할 때 showDialog나 hideDialog를 호출하면 된다.
예시는 다음과 같다:
// App.tsx
function App() {
  return (
    DialogProvider
      Layout
        {/* 페이지 콘텐츠들 */}
      /Layout
      DialogRoot /
    /DialogProvider
  );
}

// ParentComponent.tsx
function ParentComponent() {
  const { showDialog } = useDialogDispatch();

  const handleOpenUserDialog = () = {
    showDialog('USER', {
      // 필요한 props...
    });
  };

  return (
    button onClick={handleOpenUserDialog}
      유저 다이얼로그 열기
    /button
  );
}
이렇게 하면 다이얼로그가 필요한 시점에 쉽게 열 수 있고, props 구조가 달라지거나 에러 처리 로직이 바뀌어도 다이얼로그 자체는 DialogContext와 DialogRoot에서만 수정하면 된다.
이 방식의 장점은 다이얼로그 UI 컴포넌트를 특정 컴포넌트에 의존하지 않고 전역에서 한 번에 관리하므로, 유지보수와 확장성에 훨씬 유리하다.
4.5단계: 다이얼로그 상태 미리 업데이트하기 (확장)
위 방식에 추가로, 특정 다이얼로그의 상태를 미리 업데이트하고 필요한 시점에 다이얼로그의 타입만 호출하고 싶을 수 있다.
// 예시

// contexts/dialog

// ... 코드 생략 ...
// DialogAction 에 UPDATE_DIALOG 추가
export type DialogActionT extends DialogType =
  | {
      type: 'SHOW_DIALOG';
      dialogType: T;
      dialogProps?: DialogProps[T];
    }
  | { type: 'HIDE_DIALOG' }
  | { type: 'HIDE_DIALOG_ALL' }
  | {
      type: 'SHOW_ERROR';
      dialogProps: DialogProps[T];
      error?: Error;
      redirectTo?: string;
    };
  | {
      type: 'UPDATE_DIALOG';
      dialogType: T;
	  updater: (prev?: DialogProps[T] | null) = DialogProps[T];
      overwrite?: boolean;
    };


function dialogReducer(state: Dialog[], action: DialogAction): Dialog[] {
  switch (action.type) {
    case 'SHOW_DIALOG': {
      const { dialogType, dialogProps } = action
      const existingIndex = state.findIndex((d) = d.type === dialogType);

      if (existingIndex === -1) {
        // 기존에 없던 다이얼로그라면 새로 생성
        // 이때 dialogProps는 필수 인자
        if(!dialogProps){
        	throw new Error("새로 생성하는 다이얼로그의 Props가 필요합니다.")
        }

        return [
          ...state,
          {
            type: dialogType,
            props: { ...dialogProps, isOpen: true }
          },
        ];
      } else {
        // 이미 같은 type의 다이얼로그가 있다면?
        const existingDialog = state[existingIndex];
        const mergedProps = {
          // 기존 props
          ...existingDialog.props,
          // 새로 넘어온 props가 있으면 덮어씀
          ...(props ?? {}),
          isOpen: true
        };

        const updatedDialog = {
          ...existingDialog,
          props: mergedProps,
        };

        return [
          ...state.slice(0, existingIndex),
          updatedDialog,
          ...state.slice(existingIndex + 1),
        ];
      }
    }

    case 'UPDATE_DIALOG': {
      const { dialogType, dialogProps, overwrite } = action as UpdateDialogActionany;
      // 기존 다이얼로그가 있는지 확인
      const existingIndex = state.findIndex((d) = d.type === dialogType);

      if (existingIndex === -1) {
        // 없으면 새로 추가
        const newDialog = {
          type: dialogType,
          props: updater(),
        };
        return [...state, newDialog];
      }
      // 있으면 업데이트
      const existingDialog = state[existingIndex];

      // overwrite가 true면 새로 업데이트, false면 기존 props와 병합
      const baseProps = overwrite ? null : existingDialog.props;
      const updatedProps = updater(baseProps);

      const updatedDialog = {
        ...existingDialog,
        props: updatedProps,
      };

      return [
        ...state.slice(0, existingIndex),
        updatedDialog,
        ...state.slice(existingIndex + 1),
      ];
    }

    default:
      return state;
  }
}

// Hook에서 updateDialog를 제공
function useDialogDispatch() {
  const dispatch = useContext(DialogDispatchContext);

  function showDialogT extends DialogType(
    type: T,
    props?: DialogProps[T],
    // ... 기타 필요한 파라미터들
  ) {
    dispatch({ type: 'SHOW_DIALOG', dialogType: type, dialogProps: props });
  }

  function updateDialogT extends DialogType(
    type: T,
    updater: (prev?: DialogProps[T] | null) = DialogProps[T],
    overwrite?: boolean,
  ) {
    dispatch({ type: 'UPDATE_DIALOG', dialogType: type, updater, overwrite });
  }

  // hideDialog 등 다른 함수들

  return { showDialog, updateDialog /* ... */ };
}
이렇게 구현해두면, 특정 컴포넌트에서 updateDialog를 호출해 미리 특정 다이얼로그의 props를 설정해둘 수 있다. 그리고 다이얼로그를 여는 시점에는 openDialog(["다이얼로그 타입"]) 으로만 호출할 수 있다.
예를 들어 다음과 같이 작성할 수 있다.
// ParentComponent.tsx
import { useEffect } from 'react';
import { useDialogDispatch } from './hooks/dialog';

function ParentComponent() {
  const { showDialog, updateDialog } = useDialogDispatch();
  const [userName, setUserName] = useState('홍길동');
  const [userAge, setUserAge] = useState(20);
  const [userAddress, setUserAddress] = useState('서울');

  // 사용자 정보 fetch 등으로 업데이트
  useEffect(() = {
    updateDialog('USER', (prev) = ({
      ...(prev ?? {}),
      user: {
        name: userName,
        age: userAge,
        address: userAddress,
      },
    }), true);
  }, [userName, userAge, userAddress, updateDialog]);

  const handleOpenUserDialog = () = {
    // 여기서는 다이얼로그 타입만 넘겨주어도 된다.
    showDialog('USER');
  };

  return (
    button onClick={handleOpenUserDialog}
    	{"복잡한 다이얼로그 열기"}
    /button
  );
}
이런 식으로 미리 다이얼로그의 상태를 업데이트해두면, 다이얼로그를 여는 시점에서는 단순히 "어떤 다이얼로그인지"만 지정하면 되므로 코드가 좀 더 깔끔해진다.
하지만 이런 방식의 단점 또한 존재하는데, 일단 코드의 복잡도는 당연히 더 올라갔으며 파편화가 심해지면 다이얼로그의 상태가 어느 시점에 업데이트 되는지 알기 더욱 어려워진다.
결국 다이얼로그를 "보여준다."는 것 역시 다이얼로그의 isOpen 상태를 업데이트하는 것이므로 show와 update를 구분하는 것과 show 하나로 상태 업데이트를 모두 담당하도록 하는 방법에는 프로젝트의 성격이나 사용 방식에 따라 조율이 필요해 보인다.
결론
이 글에서는 Context와 Custom Hook을 활용해 다이얼로그를 선언형으로 관리하는 과정을 살펴보았다.
(1) Context 정의 → (1.5) 타입 설계(선택) → (2) DialogRoot → (3) Custom Hook → (4) 적용 순으로 정리한 뒤, (4.5) 미리 다이얼로그 상태를 업데이트해두는 확장 방법도 알아보았다.
다이얼로그는 포스트잇이다.
이전 회사에서 같이 일했던 팀원이 말씀해주신 건데, 적절한 비유라고 생각해서 기억하고 있다.

포스트잇처럼 쉽게 떼고 붙일 수 있는 것이 다이얼로그인만큼 기존 App의 컨텍스트에 영향을 주지 않으면서 변경 사항에 유연한 대응이 가능한 확장성 있는 구조로 설계해야 비로소 다이얼로그를 컴포넌트화 하는 의미가 생기는 것 같다.